Revamp Your View: A Comprehensive Guide to Window Screen Repair
Are you tired of looking at your dull, damaged window screens? Are pesky bugs and debris finding their way into your home through the holes and tears? It’s time to take control and revamp your view. Window screen repair may seem like a daunting task, but with our comprehensive guide, you’ll have all the necessary information to tackle this project with confidence. Say goodbye to unsightly screens and hello to a clear, bug-free view from inside your home. In this professional guide, we will cover everything from common screen problems to essential tools and techniques for window screen repair effectively. So let’s dive in and give those windows the makeover they deserve!
The Impact of Window Screens on Home Value and Curb Appeal
Window screens are an essential component that significantly contributes to your home’s value and curb appeal. Not only do they serve as protective barriers against insects and debris, but they also play a vital role in enhancing your home’s aesthetic appeal when they are in good condition.
Imagine a crisp, well-maintained screen that perfectly complements the design and style of your windows. These screens not only keep unwanted pests out but also make your windows look clean and polished, adding to the overall attractiveness of your property. The attention to detail in maintaining your screens can make a significant difference, as potential homebuyers often appreciate homes that require less maintenance post-purchase.
By keeping your window screens in top-notch condition, you are not only ensuring a cost-effective way to maintain your home but also potentially increasing its market value. A well-maintained home with visually appealing screens creates a positive impression, boosting its overall curb appeal and making it stand out in the real estate market.
Investing time and effort into regularly cleaning, repairing, and updating your window screens can have long-term benefits. It not only enhances the visual appeal of your home but also increases its market desirability. So, take pride in those small details that can make a big difference in elevating your home’s value and curb appeal.
DIY vs Professional Repair: Pros and Cons
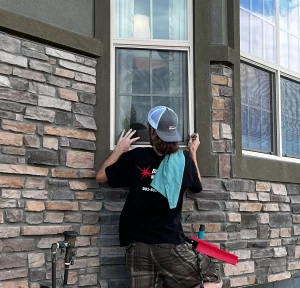
Deciding between DIY and professional repair for your window screens largely depends on your comfort level, time, and budget.
DIY Repair
Pros:
- Cost-Effective: DIY repair can be a more economical choice if you’re on a tight budget. You only need to invest in the necessary tools and materials, which are often cheaper than hiring a professional.
- Flexibility: With DIY, you can work on your own schedule. There’s no need to coordinate with a professional or wait for availability.
- Learning Experience: Performing the repair yourself can also be empowering and educational. You’ll acquire new skills that can be useful for future home improvement projects.
Cons:
- Time-Consuming: DIY projects can be time-intensive, particularly if you’re new to the task. You may need to spend time learning the process and correcting mistakes.
- Potential for Errors: Without professional knowledge, there’s a risk of making mistakes, which could potentially worsen the damage.
- No Warranty: Unlike professional services, DIY repairs usually don’t come with a warranty. If something goes wrong, you’re on your own to fix it.
Professional Repair
Pros:
- Expertise: Professionals have the necessary skills and experience to do the job efficiently and effectively. They can identify issues that might not be apparent to a novice and ensure the job is done right.
- Time-Saving: Hiring a professional window repair can save you a significant amount of time. They can complete the job faster due to their expertise and availability of professional equipment.
- Warranty: Most professionals offer a warranty on their work. If the repair fails or issues arise later, they’ll fix it at no additional charge.
Cons:
- Cost: Professional services usually come at a higher cost than DIY.
- Availability: You may need to coordinate schedules and wait for the professional to be available, which could delay the repair process.
- Less Personal Satisfaction: Some homeowners enjoy the satisfaction of completing home improvement projects themselves. Hiring a professional means missing out on that sense of achievement.
Weighing the pros and cons of each option can help you make an informed decision on whether to go the DIY route or hire a professional for your window screen repair.
Common Window Screen Issues
While window screens are robust and designed to withstand various weather conditions, they are not immune to wear and tear over time. Here are some common issues that you may experience with your window screens:
- Tears and Holes: Perhaps the most common issue, small tears or holes, can occur due to weather exposure, pets, or accidental damage. While these may seem minor, they can allow insects and debris to enter your home, compromising the screen’s effectiveness.
- Warping: Over time, window screens may warp due to temperature changes, especially in climates with extreme weather. Warped screens may not fit properly in your window frame, leading to gaps where bugs can crawl through.
- Corrosion and Rust: Especially in humid climates or if the screens are not correctly treated, metal screens can rust. This not only mars the screen’s appearance but can also lead to brittleness and holes.
- Loose or Damaged Frame: The screen frame keeps the screen material taut and in place. If the frame becomes loose, damaged, or bent, it may not hold the screen properly, diminishing its effectiveness and visual appeal.
- Fading and Discoloration: Constant exposure to sunlight can cause your screen material to fade or discolor, reducing your home’s curb appeal.
Recognizing these issues promptly and addressing them through repair or replacement will help maintain your window screens’ functionality and aesthetic appeal, drastically improving the comfort and value of your home.
Tools and Materials Needed for Window Screen Repair
Before embarking on a window screen repair project, it’s essential to gather all the necessary tools and materials. Here’s a list of what you’ll need:
- Screening Tool: This tool, also called a spline roller, has a concave and convex end to install the new spline (the flexible cord that holds the screen in place) and to press the screen into the frame.
- Replacement Screen: Choose a screen that suits your window type and location. Choices include fiberglass, aluminum, pet-resistant, and solar screens.
- New Spline: If the existing spline is damaged, you’ll need a new one. Make sure it fits in the groove of your screen frame.
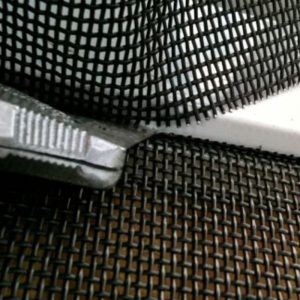
- Utility Knife: You’ll use this to trim the excess screen and spline.
- Screwdriver: A flathead screwdriver can help remove the old spline.
- Tape Measure: To measure your window frame and ensure your screen and spline are the correct lengths.
- Scissors: For cutting the screen material.
- Work Gloves: To protect your hands during the repair process.
With these tools and materials, you’ll be well-prepared to handle most common window screen repairs.
Step-by-Step Guide to Repairing Window Screens
Once you have the necessary tools and materials, follow these steps to repair your window screen:
- Remove the Screen: Start by carefully removing the damaged screen from the window frame. This usually involves unscrewing any fasteners or simply sliding it out from its track.
- Take Out the Old Spline: Use a flathead screwdriver to pry out the old spline that runs along the groove of the frame. Be careful not to damage the frame itself.
- Clean the Frame: With the screen and spline removed, clean the frame using a damp cloth to remove any dirt or debris.
- Cut the New Screen: Next, roll out your replacement screen over the frame. Using scissors, cut the screen, leaving about an inch of overhang around all sides.
- Insert New Spline: Starting at a corner, press the new spline over the screen and into the frame’s groove using the concave end of the screening tool. Make sure the screen stays taut as you work your way around the frame.
- Trim Excess Screen: After the spline is fully installed, use the utility knife to trim off the excess screen outside the spline.
- Reinstall the Screen: Finally, reinstall the screen onto your window frame. This typically involves sliding the screen back into its track or reattaching any fasteners.
Remember, while DIY repair can be a cost-effective and satisfying undertaking, it’s important to know your limits. If the repair seems too complex or time-consuming, don’t hesitate to call a professional. Safety and quality should always be your top priority. And if you do decide to hire a professional, make sure to do your research and choose a reputable company with a warranty on their work. In the end, what matters most is that your window screens are functional and add value to your home’s overall appearance.
https://www.google.com/maps?cid=15329728092816842314